Download, Customize & Upload
This guide covers the basics on downloading and uploading Libraries to SyncroSim Cloud, including:
- How to download a Library from SyncroSim Cloud
- How to customize a Library in SyncroSim Desktop
- How to publish & upload a Library to SyncroSim Cloud
- How to view your own Libraries in SyncroSim Cloud
Before continuing, be sure to review the basics of using SyncroSim Cloud in the previous section.
Download a Library
Navigate to the Explore page and click on a chosen Library to open it in the Library Viewer. From the toolbar, click on the download icon to begin the download process.

Opening a SyncroSim Library on your computer requires the SyncroSim Desktop software. The software is available to download for free from syncrosim.com/desktop. Download the latest stable release and follow the prompts to install the software on your computer.
Once SyncroSim Desktop and the required SyncroSim Package for the Library are installed, navigate to your Downloads folder and double click on the .ssimbak file to automatically open SyncroSim Desktop. You will be prompted to choose where you would like to save the Library. When ready, click Save and the Library should automatically open in SyncroSim Desktop.

Note
A .ssimbak file is a specific file type that contains the .ssim Library file with all its inputs and outputs.
Customize a Library
Once the Library is opened in SyncroSim Desktop, you may find that it contains more Scenarios, Charts, and Maps than those available to view on SyncroSim Cloud.
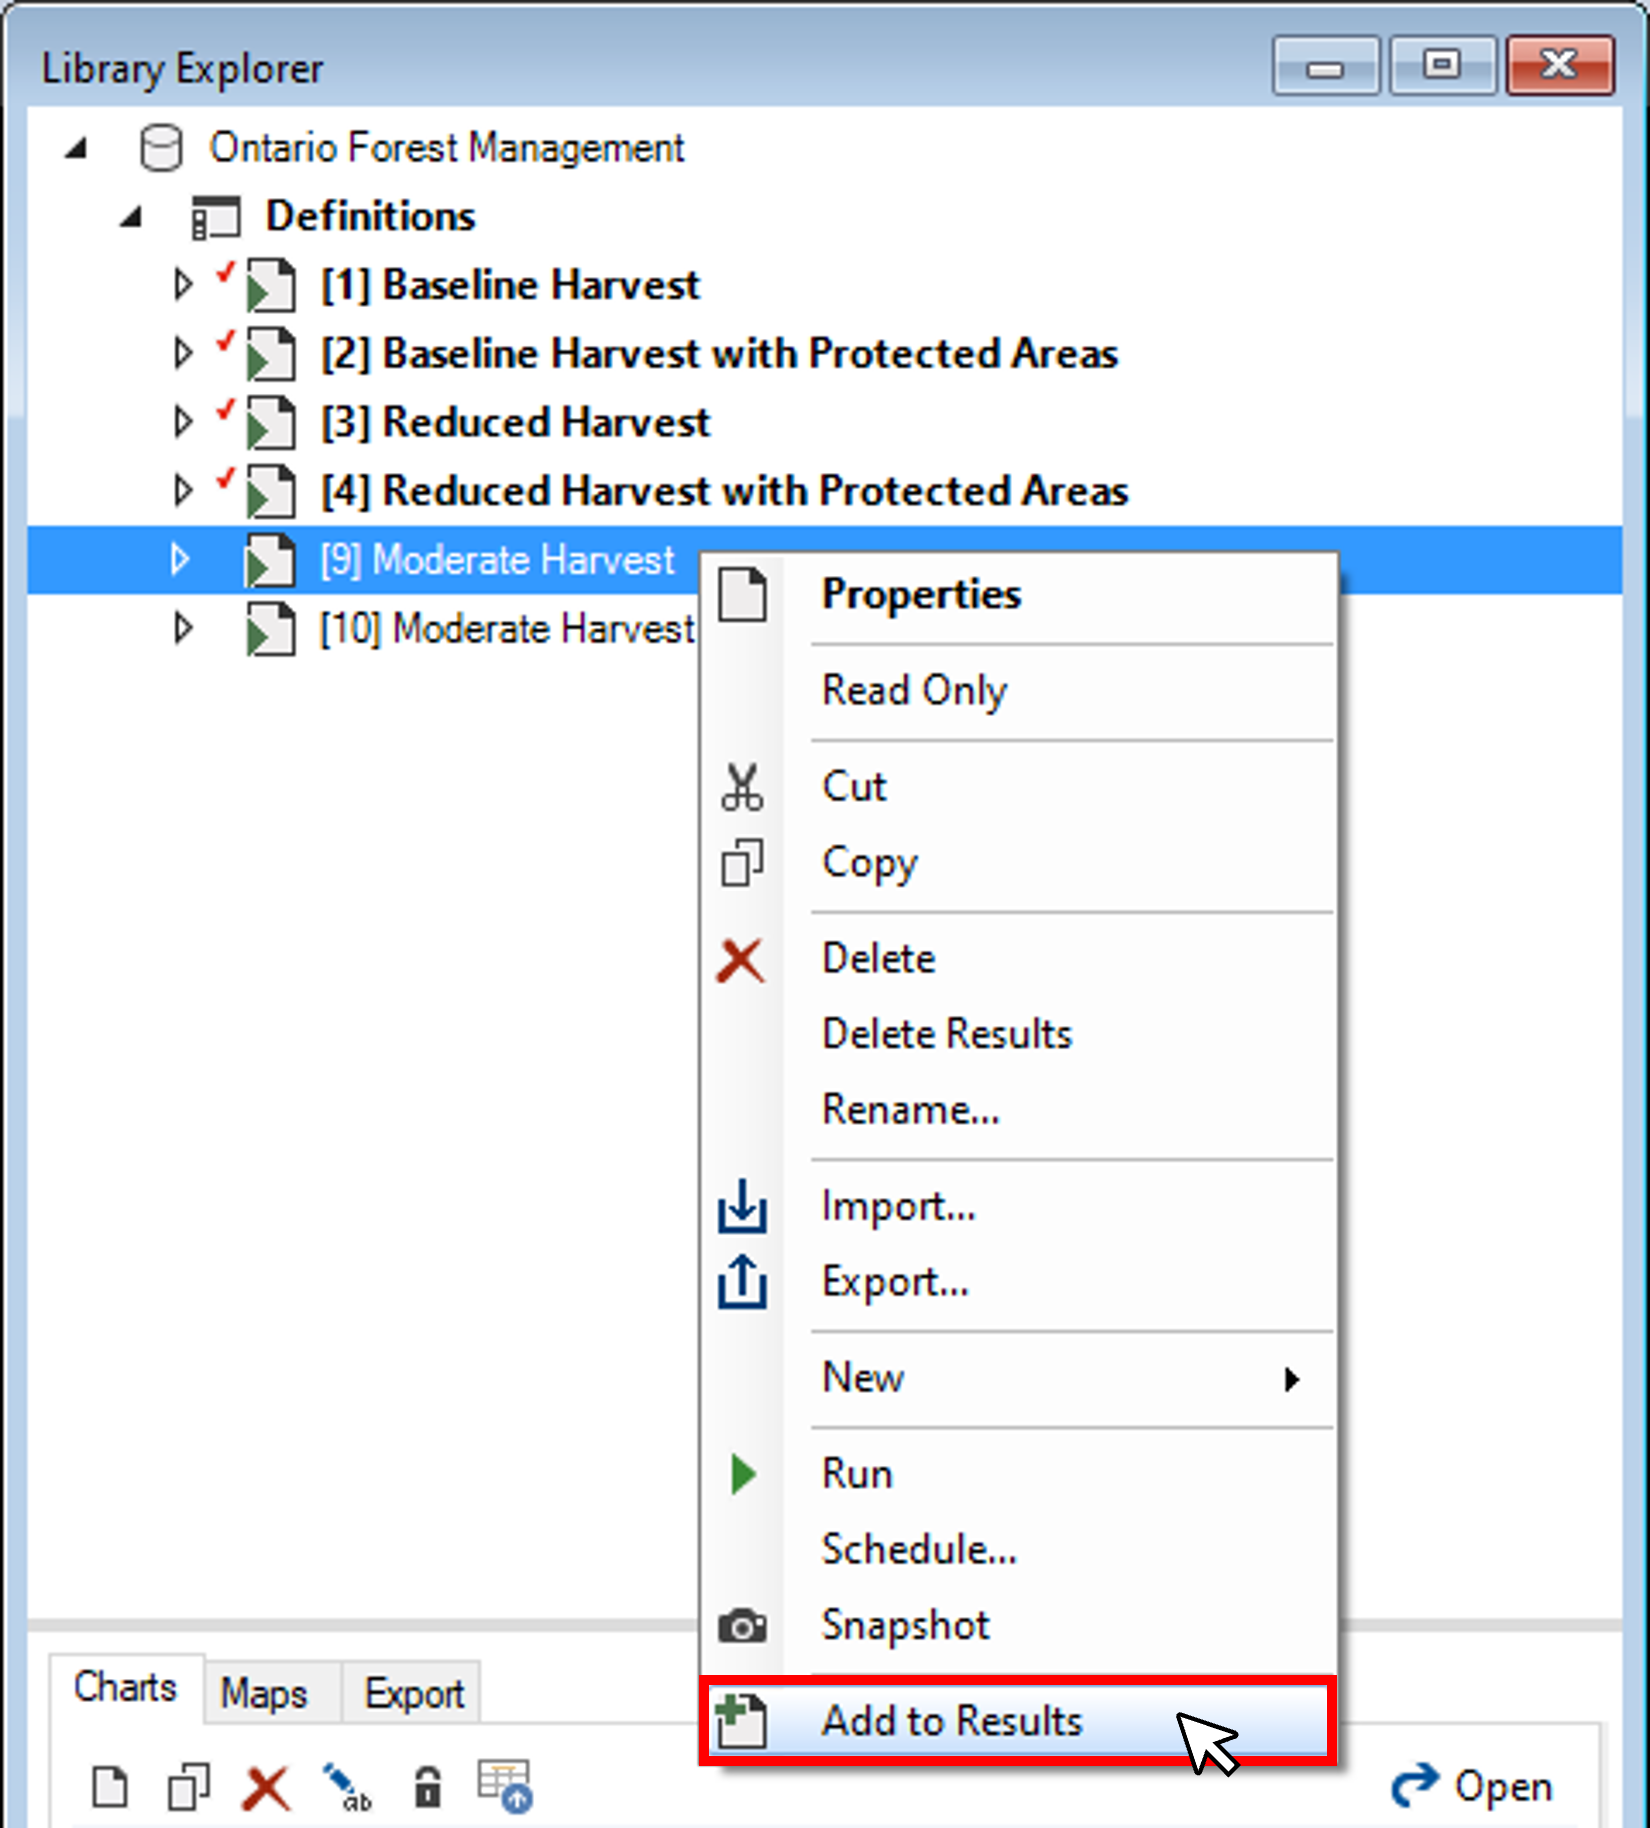
Active Scenarios are identified by the bolded font and red check mark icon ![]() , and correspond to the Scenarios displayed on SyncroSim Cloud.
, and correspond to the Scenarios displayed on SyncroSim Cloud.
To activate additional Scenarios, right-click on the target Scenario in the Library Explorer, and select Add to Results from the context menu. To deactivate a Scenario, choose Remove from Results.
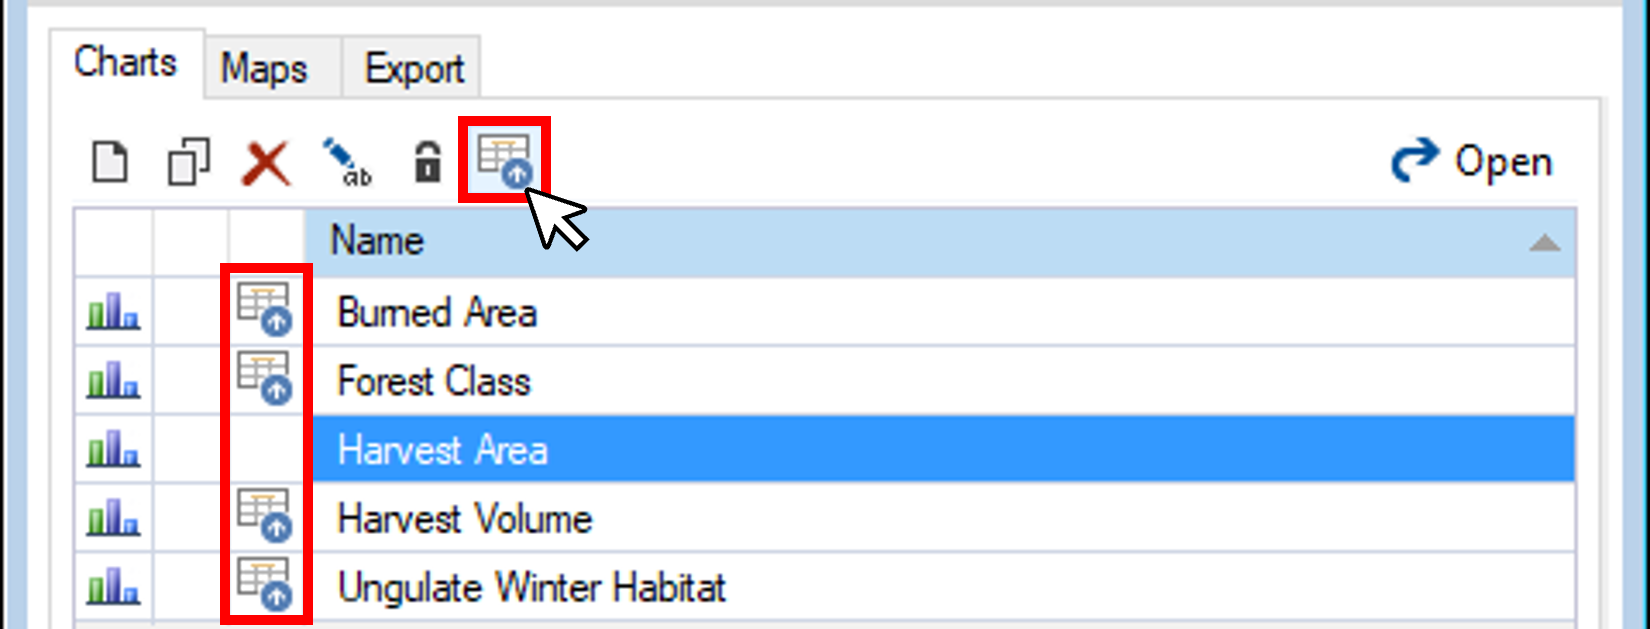
For Charts and Maps, only those selected for publication are displayed on SyncroSim Cloud.
Charts and Maps selected for publication are indicated by the publish icon ![]() left of the Chart or Map name.
left of the Chart or Map name.
To add a Chart or Map for publication, select it and click on the Publish icon in the Map or Chart Toolbar. The same process can be done to remove a Map or Chart from publication.
Publish & Upload a Library
When your Library is ready for SyncroSim Cloud, right-click on the Library name, and select Publish from the context menu.
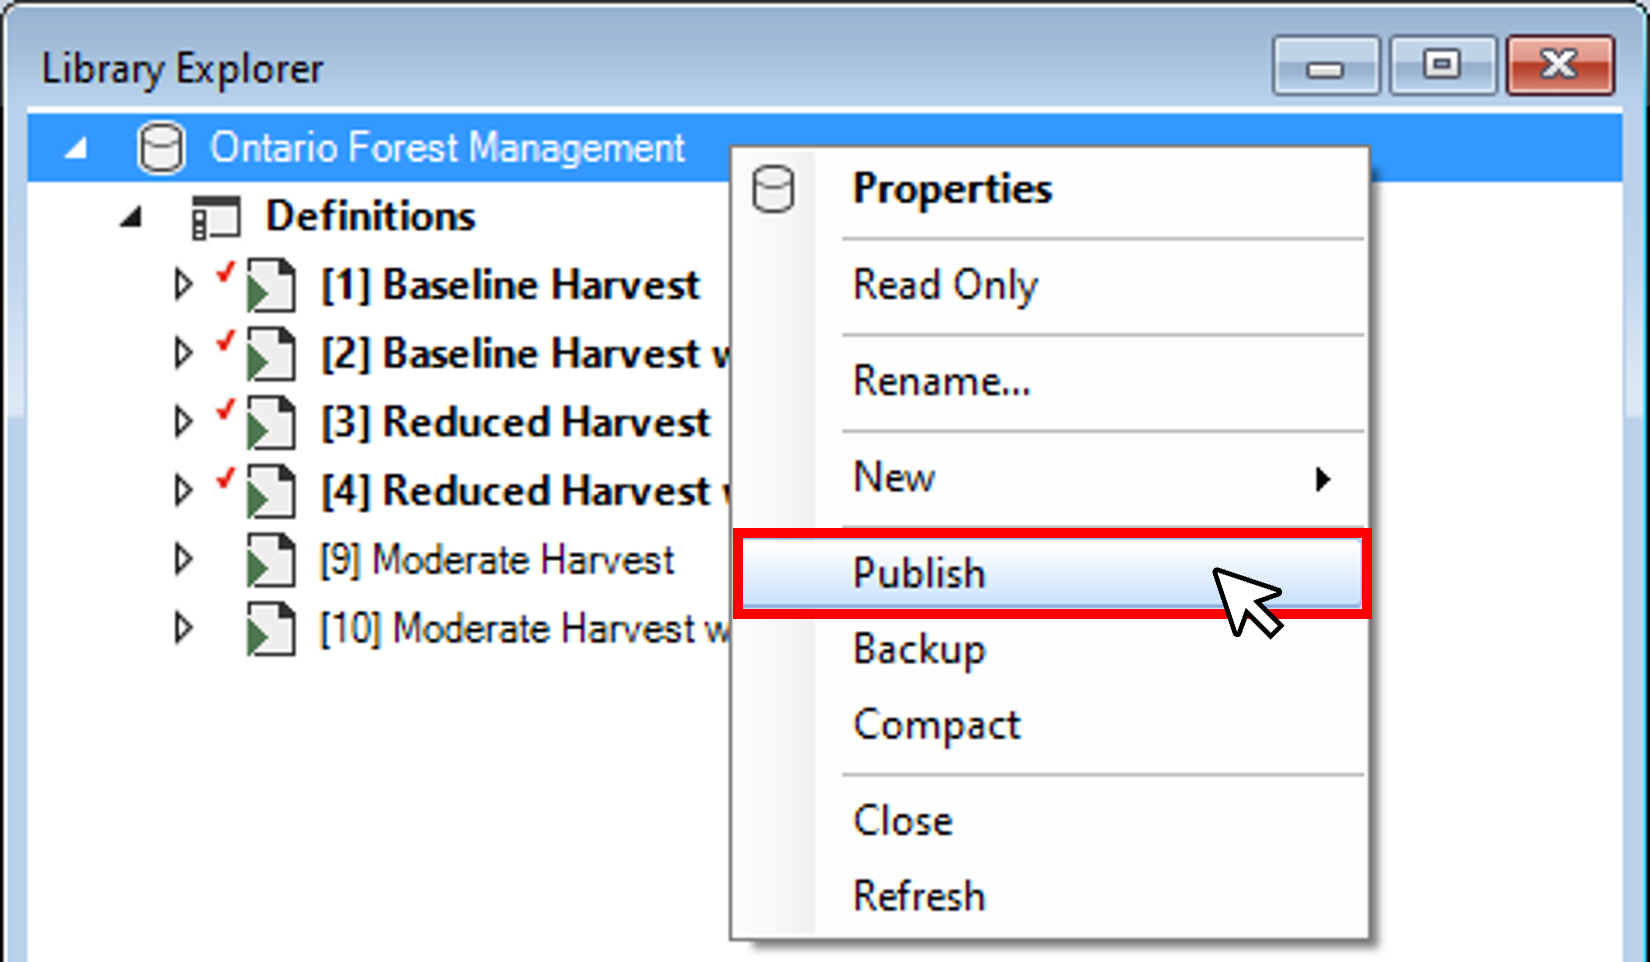
Follow the prompts to complete the publishing process that creates a .ssim.publish folder containing the files needed to upload the Library to SyncroSim Cloud.
To continue, you will need a SyncroSim account, which you can create for free at syncrosim.com/signup. If you already have an account, make sure you are logged in.
From the top navigation bar, click on the Upload icon ![]() . In the dialog box that opens, navigate to where the .ssim.publish folder for your customized library is located, select the folder named after the Library, and click Upload.
. In the dialog box that opens, navigate to where the .ssim.publish folder for your customized library is located, select the folder named after the Library, and click Upload.

Once the upload is in progress, the Library will automatically open in the Library Viewer, where you will see the Scenarios, Maps and Charts that were selected to be displayed in the customization section above.
To upload a new library or to overwrite a Library with changes, simply repeat the same steps.
My Libraries
From the top navigation bar, click on My Libraries.
On this page, you will see all the Libraries that you uploaded or that have been shared with you by other users. In the example below, the user has three different types of Libraries: a private Library that has been shared with them, a public Library that they own, and a private Library that they own.
